Are you excited to unbox your new
mobility scooter but feeling overwhelmed by the thought of putting it together? You’re not alone—many first-time owners worry about messing up the assembly, but the process is far simpler than it seems. With basic tools, a little patience, and this step-by-step guide, you’ll have your scooter ready to roll in no time. We’ll also cover key maintenance tips to keep it running smoothly for years to come. Let’s dive in!
- Assembling your own mobility scooter saves you time and money on professional setup fees while helping you learn how your device works.
- You only need a few common tools: a adjustable wrench, Phillips-head screwdriver, and the manufacturer’s manual (don’t skip this!).
- Following a structured process ensures safety and proper functionality—no technical expertise required.
Do-it-yourself assembly has surprising benefits. First, it lets you familiarize yourself with every part—from the battery to the brakes—so you’ll spot small issues before they become big problems. Second, it’s cost-effective: professional assembly can add $50–$100 to your purchase price. Finally, it gives you confidence: knowing you built your scooter means you’ll feel more comfortable adjusting or maintaining it later. For models like the Kymco Mini Comfort, which has a modular design, assembly is even easier—think of it like putting together a simple piece of furniture.
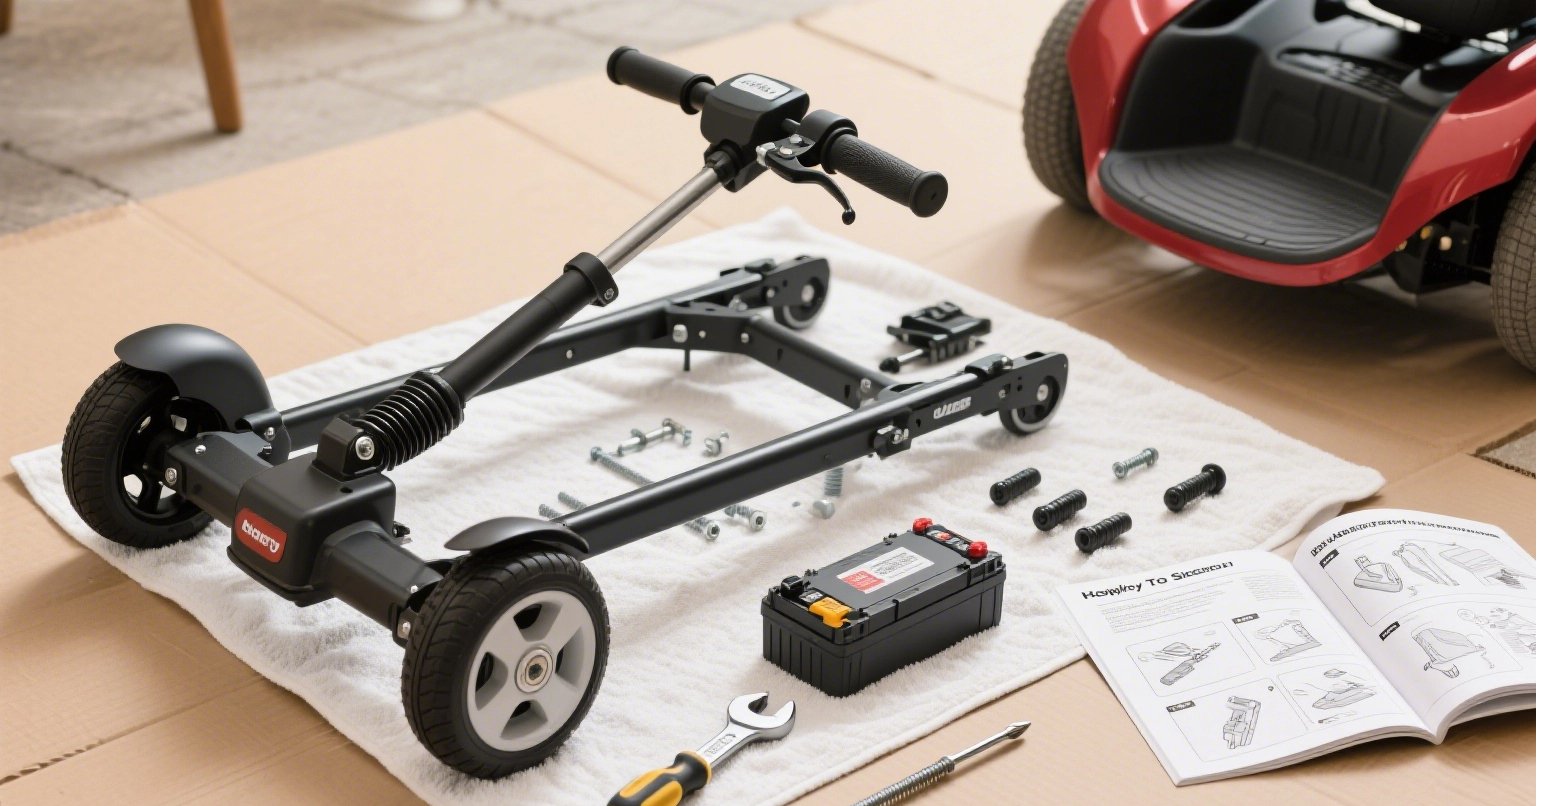
You won’t need a fancy toolbox—just these basics:
- An adjustable wrench (for tightening bolts).
- A Phillips-head screwdriver (most scooters use Phillips screws).
- The manufacturer’s instruction manual (critical for model-specific steps).
- Optional: A pair of pliers (for stubborn connections) and a flat, well-lit workspace (to avoid losing small parts).
Pro tip: Lay out a clean towel or cardboard to protect the scooter’s frame from scratches while you work.
Whether you have a Rascal Vippi, Pride Elite Traveller LX, or TGA Zest Plus, these steps apply to most standard mobility scooters. Always cross-check with your manual for unique details!
Start by carefully unpacking the box—use scissors (not a knife!) to avoid cutting the scooter’s components. Remove all parts and lay them out on your workspace. Typical pieces include:
- The main base frame (the largest part).
- Front and rear wheels (usually pre-inflated, but check the manual).
- Handlebars/steering tiller.
- Seat and seat post.
- Battery and battery charger.
- Optional accessories: basket, cup holder, or armrests.
Take 5 minutes to match each part to the photos in the manual—this ensures you don’t miss anything (a common mistake is forgetting small bolts or washers!).
First, secure the front wheel to the base frame. For most models, align the wheel’s axle with the fork on the front of the frame, then slide a bolt through the hole and tighten it with your wrench. Don’t over-tighten—you want the wheel to spin freely but not wobble.
Next, attach the handlebars to the steering tiller (the metal pole that connects to the front wheel). Insert the tiller into the hole on the front of the frame, then use the provided bolt to lock it in place. Adjust the handlebars to a height that feels comfortable (you’ll fine-tune this later!).
Batteries are heavy—ask for help if needed! Locate the battery compartment (usually under the seat or at the back of the frame). Remove the compartment cover, then carefully lower the battery into place. Connect the red (positive) and black (negative) wires to the corresponding terminals on the battery—match the colors to avoid electrical issues. Replace the cover and secure it with the provided screws.
Important: Don’t plug in the charger yet—you’ll do that after assembly is complete.
Slide the seat post into the hole on the back of the base frame. Tighten the clamp or bolt at the base of the post to hold it in place. Then, place the seat onto the top of the post and secure it with the screws included. Most seats swivel, so test that it moves smoothly but doesn’t feel loose. Adjust the seat’s position forward or backward to fit your body—your feet should reach the floor (or footrests) comfortably.
Now, fine-tune the tiller height and angle. Loosen the adjustment lever (usually on the side of the tiller) and move it up/down until the handlebars are at waist level. Tilt the tiller slightly toward you for easier control, then re-tighten the lever. Test the steering by moving the handlebars left and right—they should turn smoothly without sticking.
If your scooter came with a basket, attach it to the front or back of the frame using the provided brackets and screws. Make sure it’s secure—you don’t want it to swing while riding. Add other accessories (like a cup holder) following the manual’s instructions—most snap or screw into place easily.
You’re almost done! First, check all connections: wiggle the handlebars, seat, and wheels to ensure nothing is loose. Then, turn on the scooter (the power button is usually on the handlebars) and test the forward/reverse controls in a safe, open space (like a garage or driveway). Check the brakes—they should stop the scooter smoothly. If something feels off (e.g., the scooter pulls to one side), double-check your assembly or consult the manual.
Assembling a mobility scooter doesn’t have to be intimidating. With this guide, basic tools, and a little patience, you’ll be cruising independently in an hour or less. Remember: the key is to take your time, follow the manual, and test everything before your first ride. By maintaining your scooter regularly—especially the battery—you’ll ensure it stays reliable for years to come. Whether you’re running errands, visiting friends, or exploring your neighborhood, your new scooter is ready to help you stay active and independent. Happy riding!